
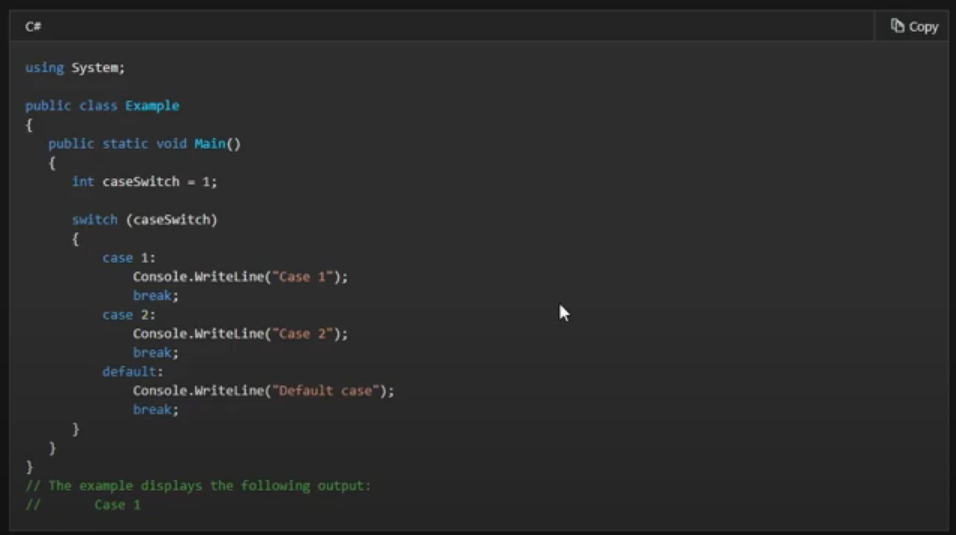
Today we are going to be learning about switches in C#!
Switch statements are a way to simplify if statements. Once you get a lot of if statements together the code starts becoming very cumbersome and switches are just a really elegant way of cleaning that up.
Today, We are going to break switches down while creating a sample application!
If you were with us last time, you are probably familiar with this form that we designed previously. This form has a label and a textbox. It also has a picture box that we are going to change the background color of using switch statements. We also have a button to perform calculations.
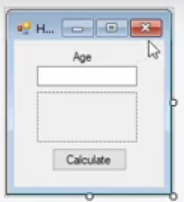
First, we are going to set the label control up for our new project. We are going to change the label’s text from “age” to “color” and change it’s name to “lblcolor”

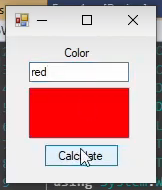
The idea of the application is going to be that the user can type in the name of a few different colors and we will update the picture box’s background color to reflect whatever color the user input.
Alright,
To do that we’re going to use a switch statement that switches based on the text you type into the textbox. We are going to have a case that’s going to be red and our first build will end there. This is basically just a simple if statement.
Inside the select statement we are going to say
pbResult.BackColor = Color.Red;This will set the picture box’s background color to red. Now we are going to add a few other colors, such as Blue, Black, and White.
Keep in mind, CSharp is case sensitive, so this has to be a capital “B” for “Black”
switch (txtColor.Text)
{
case "red":
pbResult.BackColor = Color.Red;
break;
case "blue":
pbResult.BackColor = Color.Blue;
break;
case "black":
pbResult.BackColor = Color.Black;
break;
case "white":
pbResult.BackColor = Color.White;
break;
default:
pbResult.BackColor = Color.Brown;
break;
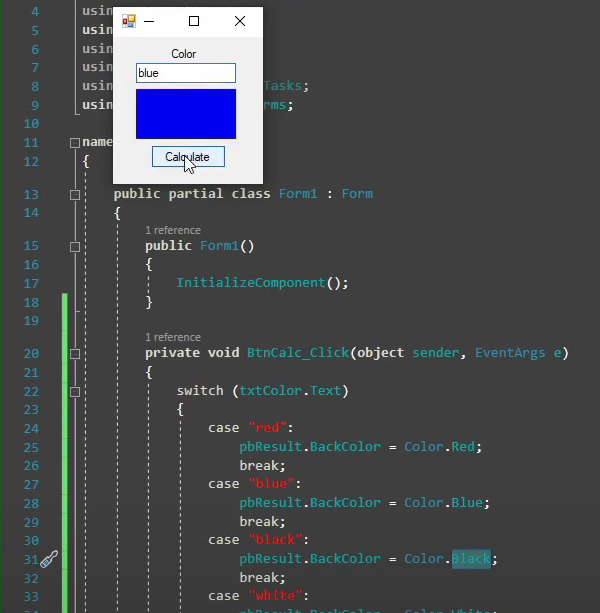
}all right, so once you have recreated the UI and you have the above code in the click event of the button. It is time to run the application and give it a test.
What should happen is, when you type “red” into the textbox and then click the button, it will run the block of code that sets the BackColor to Red. When you type “blue” into the textbox and press the button, it will change the BackColor of the picture box to Blue!
You could create this same logic with an IF statement but it would be a lot longer. The logic here is simply, if text = “red” then set the background color to red, elseif text = “blue” then set the background color to blue, and you would just repeat that logic for every color and use an else in place of default.
I hope this simple explanation of switches in C# helped! I am a hands-on type learner myself, so projects like this is how I prefer to learn things.
If you have any questions please ask in the comments below! Also, if you want me to go over any topics just let me know! I appreciate you guys sticking around and would love to help with topics you have in mind!
I’ll see you in the next one!