
Beginning C# – Hello World – Create a basic windows app in Visual Studio 2019
hey everyone!
Darren here and today we’re going to be learning c sharp. We are going to kick this off by creating a hello world application!
This is going to be a simple little application where we have a label that says some text and we’re going to click on a button to change what that text says.
We may change some styles of the label and a couple of other things but this will be great to get you started learning software development!
Hopefully, this will help you get started. This is not going to be the most complicated application ever but let’s get right into it!
Okay, so first we are going to choose windows forms application c-sharp for windows.

We are going to click next and then we are going to call this project “hello world”.

It is going to save in our repos folder, which is where visual studio 2019 saves all of it’s new projects by default. We are also going to use the latest version of the.net framework we have installed. After that we click create and then it’s going to open a new project with our new form.
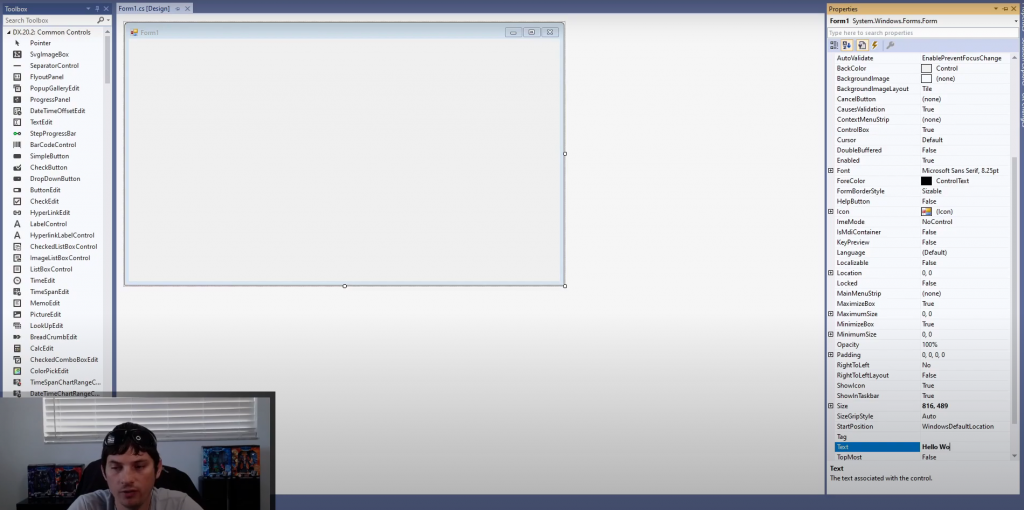
Just for fun i’m just going to change the text property on our form so i have this whole form selected and i choose the text property and just change the text to “hello world” and it’ll change the text up here.
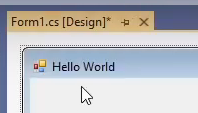
Next, I’m going to go ahead and run this. When it’s running you can see that the text up top now says is “hello world” in the title. Visual Studio generates a regular form that looks just like every other application, you can drag it around, minimize and maximize it.
That all works but it’s simply a blank form for now.
Next, we are going to add some text to that form. The control to add text in C# would be the label control. So we are going to drag over a label here.

Next, I’m going to bring up the properties window for that label and you can change the text of it right here. I’m gonna change the text to “test”. I’m also going to rename the label to a test name. The name property is what you would reference this label by in code.
Alright, so now that our label has some new custom text and it has a new name. We are going to make our label bigger so we can see it better.
we will start by making it 48 point to make it super big! Something else cool you can do is: go up here to format and center the label in the form horizontally. After this our label is ready to go.
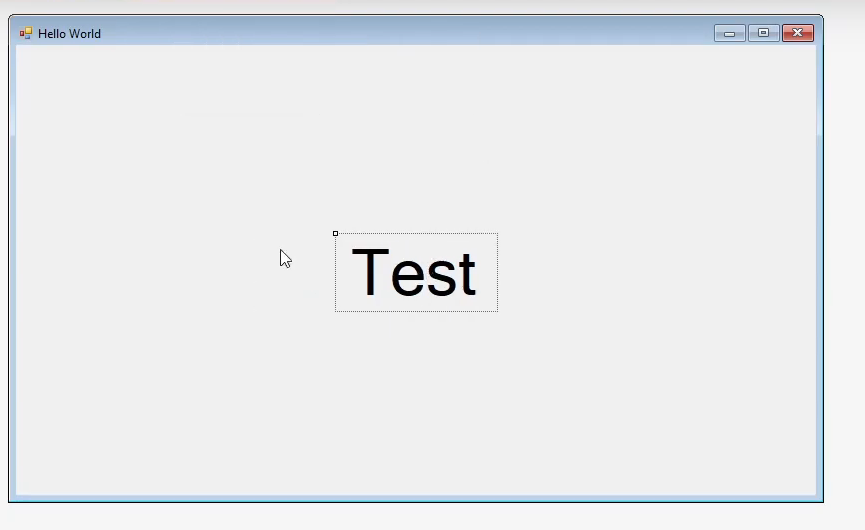
Next, we are going to start our project and now we have this label in the middle of our form that simply says “Test”.
Alright, so now we want to add a button because we’re going to actually make some stuff happen. So we head over to our toolbox on the left and drag this button over to our form.
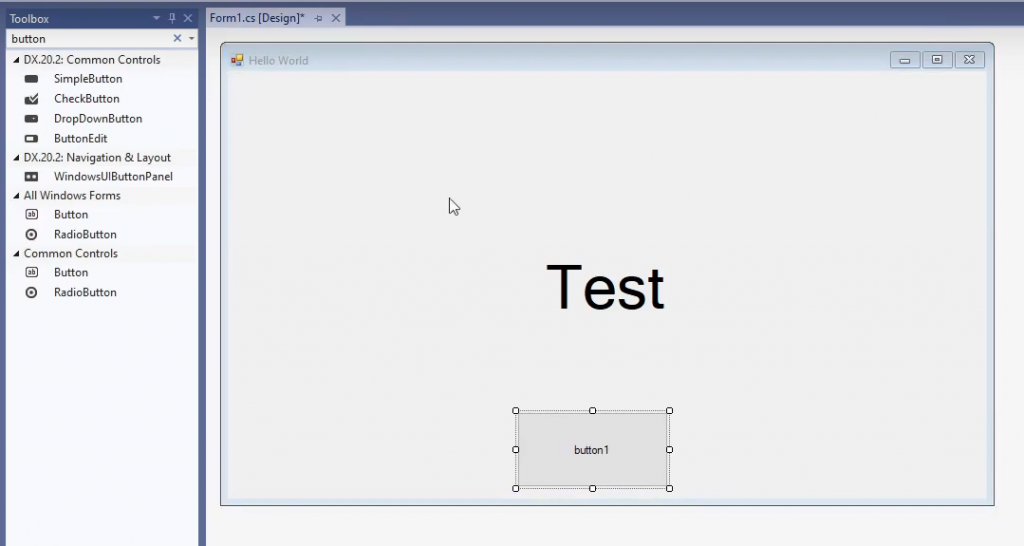
Let’s head over to Format and center this button horizontally. I’m also going to change the text of the button just to say “click me!” using the text property.
Next, let’s name it “BtnClickMe”, so now we have a button called button click me and we have our test label ready to go.
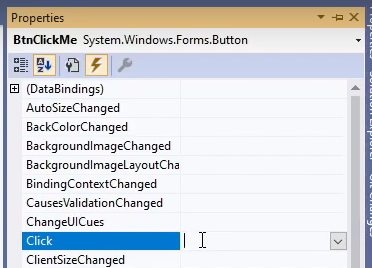
With any of these controls that are on a form, they’re going to have events that you can access from the properties window. So if you come over here to events, there is a click event for this button and this will allow you to execute custom code when this button is clicked on.
If you select over here on the right side of the click event in the properties window and double click, visual studio will actually generate the click event handler for you.
Once you have the method generated in code, click inside of it and we are going to write one line of code that will change the text of our label.
lblTest.Text = "Hello World!";First, we call it our lblTest and lblTest has a Text property. The actual text of this label is stored inside of this Text property. We set this text property equal to the text “Hello World!”.
“Hello World!” has to be in quotes because that is how you tell C# it is a string. The last thing is the semi-colon on the end, which is customary in any C-Syntax based language.
The resulting function looks like this:

This will get executed when the button is clicked because this is the click event handler of that button.
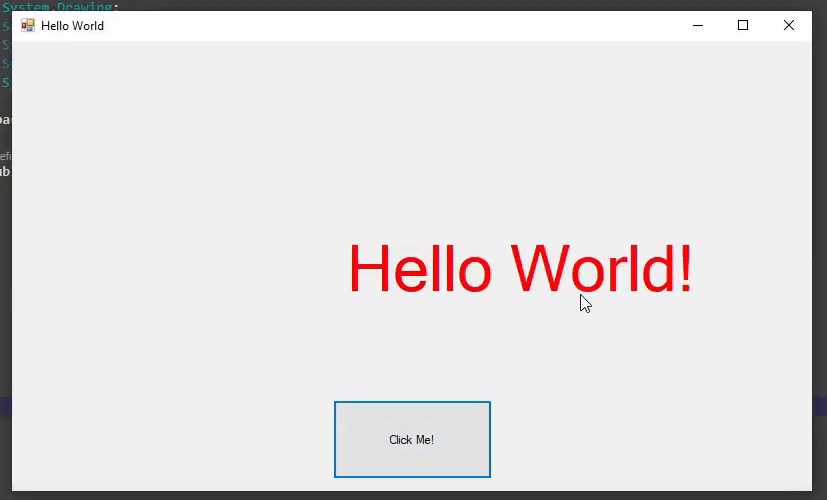
So, next, we head back to the designer where we can hit start and run the program.

So, now we’ve got our little label that says “Test” and then when we click our button, the label changes to “Hello World!”. It’s really that easy to get events firing and change simple things on the form.
For fun, we are going to go ahead and change the font color of the label when the button gets clicked, so you kind of get a better idea of what’s going on.
So, to do that, our label actually has a forcolor property that controls the foreground color. We are going to set that to Color.Red to set the foreground color of the label to Red.
LblTest.ForeColor = Color.Red;Color.Red is just the enumerator for the color red. This literally just means red. so, we run the application again and click our button. now it says “Hello World!” and our text is now red.
alright, so to keep this short and simple, we are going to end off there. I hope you were able to set the color to red on your test form and get the text to say Hello world.
After you get this going, you can definitely play around with other options and for example, set the label’s back color to black.
There are lots and lots of properties you can change and all kinds of other details about the label control you can edit on the fly.
I also want to point out that there are tons and tons of other controls out there. The possibilities are nearly endless. I really recommend just creating a new project and playing around with all of these different controls. Just start learning everything you can!
Alright, that about wraps it up for this one. I really hope that you learned something from this. I know this isn’t the most complicated project every but we will definitely get into more complicated projects going forward.
Well, thanks again and I’ll see you in the next one!