
How to write to Excel files in CSharp
We are going to be writing data to Excel files using C#. Writing code to add data to an Excel sheet in C# is really easy! You can write to Xlsx, Xlsm and Xls formats all in the same way! We will go over how to do that step by step! Follow along and you will be able to write values to excel files with ease!
I’ve also created a video guide on how to do this that is embedded below and that will show you the entire process! If you would like to learn how to write to excel files from a text-based format though, read on!
Include the Required Assembly File
The first thing we need to do is include the Microsoft.Office.Interop.Excel assembly. This will contain all of the functions we will be using to write an excel document out using C#.
To include that assembly we will need to do two things, the first of which is add it to the references section.
Add reference to Excel Interop Assembly
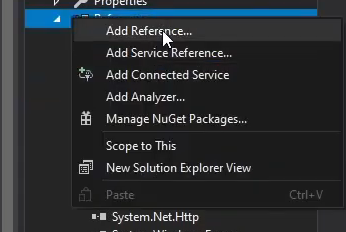
- Right click References and click “Add a reference”
In solution Explorer, right click on “References” and then click “Add a reference” to bring up the Reference Manager.
- Click COM and then search for excel
Click COM on the left of your Reference Manager and then go to the search box on the right. Once there type “excel” to search for Microsoft Excel 16.0 Object Library.
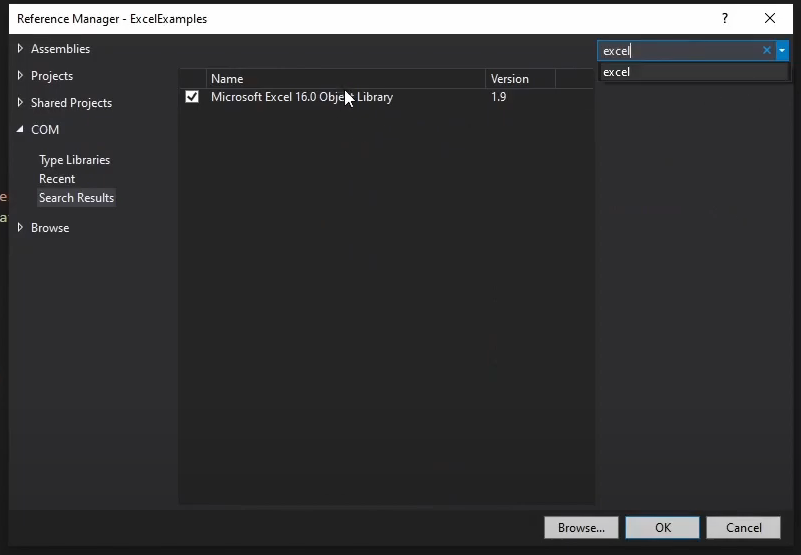
- Click OK to Add the reference to your project
Make sure the reference is checked and then hit OK to add it to your project.
Add the using statement
Next, we are going to add the Using statement to the top of our class. This will look like the code below.
using Microsoft.Office.Interop.Excel;Create a button to write to Excel
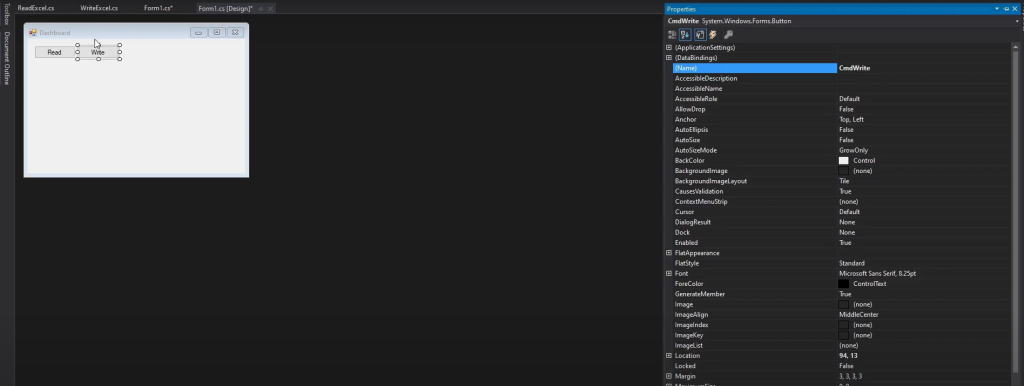
Next, head over to your designer and add a button. This new button will be named “CmdWrite” and when pressed is going to call our write excel code. After dragging the new button from our toolbox, renaming it “CmdWrite” and then changing its text to “Write”, it’s time to double-click it to get back to the code screen.
Call our WriteExcel function
In our Form1.cs code behind the designer class, we are only going to have one line of code. This line of code will call our writeExcel function inside of our WriteExcel class. I’ll write out the code below to make it easy to copy/paste.
private void CmdWrite_Click(object sender, EventArgs e) {
     WriteExcel.writeExcel();
}
Create a new Class with a writeExcel function
Create a new file in your solution explorer called “writeExcel.cs” This new class needs to be a “code file” and it will be .cs because we are writing in C#. Once you create that file, you need to add a static void function called writeExcel. I’ll write the class out below.
class WriteExcel
{
     public static void writeExcel()
     {

     }
}
Create an Excel application and declare our file path
First, we are going to declare our filePath variable, to keep track of where our excel file will be saved. Next, we are going to create a new Excel Application and then declare a worksheet and a workbook. I’ll
public static void writeExcel {
     {
         string filePath = "c:\\Simple\\ExcelTest.xlsx";
         Microsoft.Office.Interop.Excel.Application excel = new Microsoft.Office.Interop.Excel.Application();
         Workbook wb;
         Worksheet ws;
     }
}
Open a worksheet inside of a workbook
Open a worksheet inside of an existing workbook to begin editing that sheet. Excel starts it’s indexes with 1 instead of 0, so you want to use worksheets[1] to get the first worksheet in your workbook.
wb = excel.Workbooks.Open(filePath);
ws = wb.Worksheets[1];
Select an Excel Range and change it’s value
Next, we are going to select an Excel range. In our example, this range is going to be C1 to C1, which is just the C1 cell. We are going to set that range’s value to “Pizza!” in our example code below.
Range cellRange = ws.Range["C1:C1"];
cellRange.Value = "Pizza!";
Save and Close the Excel Document
Lastly, we need to save and close our excel document. To save your changes to the Excel document and close it, you will need to add the 2 lines of code below. I will include all of the above code though, so you can easily copy/paste the finished product.
public static void writeExcel {
{
string filePath = "c:\\Simple\\ExcelTest.xlsx";
Microsoft.Office.Interop.Excel.Application excel = new Microsoft.Office.Interop.Excel.Application();
Workbook wb;
Worksheet ws;
wb = excel.Workbooks.Open(filePath);
ws = wb.Worksheets[1];
Range cellRange = ws.Range["C1:C1"];
cellRange.Value = "Pizza!";
wb.SaveAs("c:\\Simple\\ExcelTest5.xlsx");
wb.close();
}
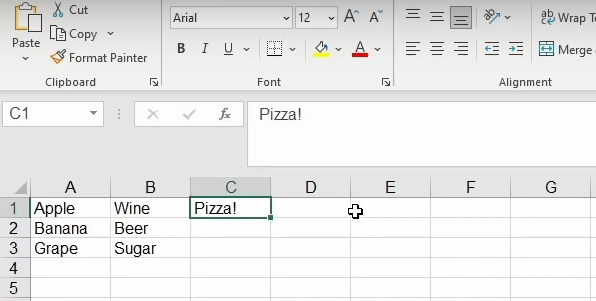
}We now have Pizza written to our Excel Document
At this point, you should be able to run your application and it should add “Pizza!” to your excel document just like it did in mine here. If you are having trouble with this, be sure to watch my video above for step by step instructions.
Opening an Excel file with C#
I wanted to toss in a tip about how to Open the excel file after you have saved your changes to it. You can use Process.start to open the excel file. The only trick is that you need to add a Using statement for System.diagnostics. I’ll add the two lines of code below, keep in mind the Using statement goes at the top of your class and the Process.Start will go in our writeExcel function.
using System.Diagnostics;

Process.start("c:\\Simple\\ExcelTest5.xlsx");
In Closing
Well, that’s about it for the absolute basics on writing to an Excel file! I hope this quick guide helps you get started and if you have any questions, feel free to ask in the comments below!