
How to set up a Windows 10 FTP server – FileZilla FTP Server setup
How to set up a Windows 10 FTP server – FileZilla FTP Server setup
Using a free tool called FileZilla, we’ll walk you through the procedures to set up a folder on your Windows PC as an FTP repository. FTP allows you to easily transfer large amounts of data between computers; the FTP repository can be mapped to multiple computers across the Internet, allowing others to access the directory directly from Windows Explorer.

Download Filezilla
The first step is to download Filezilla server.
- Go to https://filezilla-project.org in your browser. It will take us to the FileZilla Server download page if we click Download FileZilla Server.
Install Filezilla
Once the executable setup file is on your system follow the below steps to install it on your OS.
- Double click on the FileZilla_Server setup file
- Click on the Yes button, when it will ask your permission to run the setup.
- Next, select the “I Agree” to accept the terms and conditions of the software.
- Installing the Standard package is the default option. The only thing that will be unselected is “source code,” which you may choose if you are a developer or want to look at FileZilla’s code. Normally, though, we may leave it unchecked.

- Select the Next button
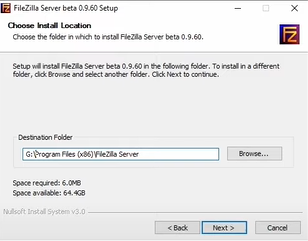
- The destination folder will set to use the C drive, in case you don’t want to install it there, you can change it. Otherwise, click Next.
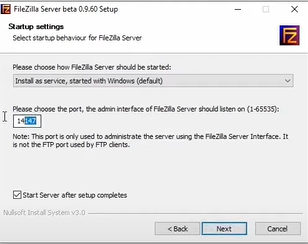
Leave the default option “Install as a server, starting with Windows” to let the FileZilla server start automatically with Windows. You can select that option if you wish to start it manually.
For the sake of this lesson, everything else may be left at the defaults except for the parameters listed above. The FileZilla interface will appear after the installation is complete. Now your installation is complete!
Configure Filezilla
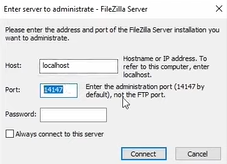
When this window appears after installation, simply click OK:
We may now define a directory as an FTP repository after the FTP server UI has loaded. Minimize the UI and create a folder where you want the FTP share to reside if the directory you wish to use isn’t already there.
Add a User Account
Now the FileZilla FTP Server has been installed on Windows 10, we need to create an FTP user that can log in to the server. To set up an FTP user in the FileZilla server, complete the following steps:
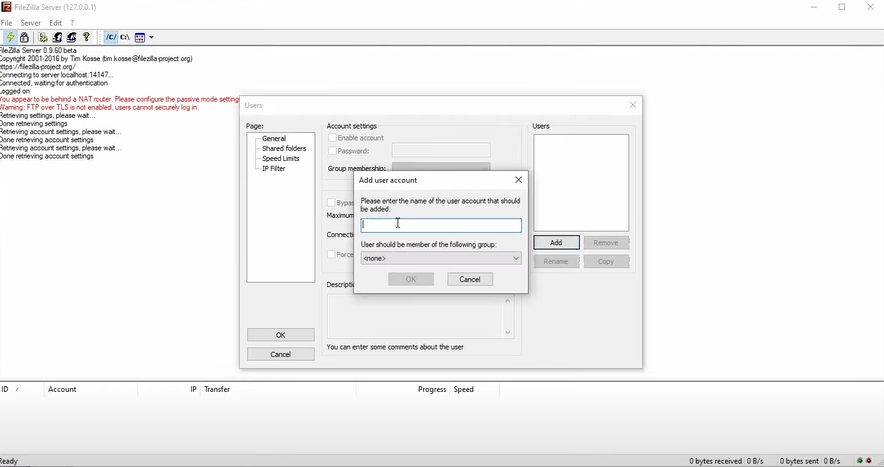
- Click on the user icon (the Fourth icon from the left). Then, click on the add button and enter the name of the user account to be created and press OK.
- On the left side of the window that comes up, click on “Shared folders.”
- Once there, click on “Add” underneath “Users.” Enter the username for an account that another computer will be using to access the repository we’re setting up.
- Click OK once you’re done entering the account name, and then click on “Add” underneath the “Shared folders” section. Next is to select the directory you would like to share as an FTP repository.
- Click OK again. By default, the user we’ve created is able to read files, list directories, and list subdirectories. To give the user further permissions, such as the ability to copy files to this repository, check the boxes beneath ‘Files’ and ‘Directories.’
- Click OK once you’re done setting the user permissions.
And now our new FTP server is running!