
How to set up Caching on Laravel 5.7+
If your Laravel based website is having issues handling too many users then you may need to enable caching. Caching is a great way to allow your server to keep up with high demand without adding more costly resources.
With Laravel 5.6+ you no longer need to add custom middleware to set up caching. You can enable client-side browser caching using the built-in cache headers middleware. This makes life very easy!
The easiest type of caching to set up is browser caching. This will quickly take a huge load off of your server because the users will stop requesting large files over and over again. They will maintain the files in a local cache until the time that you set runs out and they request the files again. (Think about how many times a user should be requesting the background image for your site that shows up on every page.)
There are two different ways you can set up browser caching in Laravel.
Setup Caching Globally
The first way is to set it up inside of the MapWebRoutes & MapApiRoutes functions that are in the RouteServiceProvider.php file.
While this way is super easy to configure, you will have issues with any kind of login system. The browser caching will mess up the keys and break things. If your website doesn’t require a login, this is definitely the way to go as it is super easy to implement and will work fine.
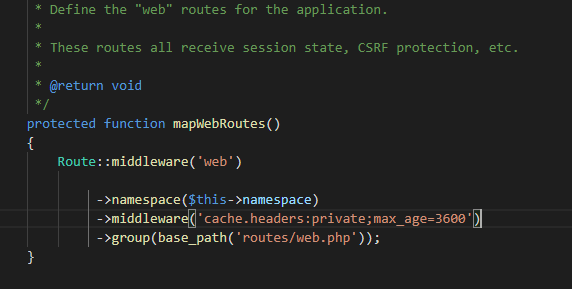
Locate your mapWebRoutes inside of RouteServiceProvider.php and add the following line after ->namespace($this->namespace)
->middleware('cache.headers:private;max_age=3600')Mine ended up looking like this:
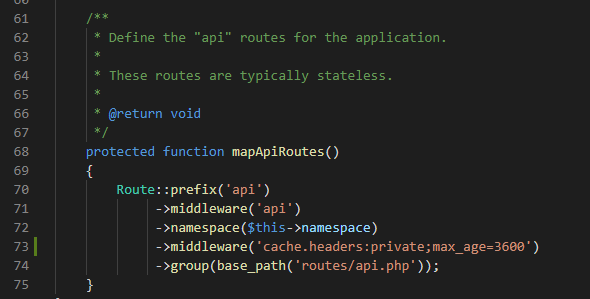
After that find your mapApiRoutes and add the same line. Mine ended up looking like this
That’s all there is to setting caching up globally in Laravel 5.7+
Hopefully, that helps, if you do have a login system though, keep reading on to only set caching up for specific routes that don’t involve your login system!
Setup Caching Specific Routes
The second method is to set the cache for each route in your web.app config file. This method is better than the first if you have a login system because you can skip any routes that interact with your login system.
Skipping the login items will allow your login system to still work while the other parts of your webpage are cached appropriately. This will provide a tremendous speed increase while still keeping your login system in place.
Time needed: 10 minutes.
To setup caching in a specific route
- Open your web.php file
The first step will be to open your web.php file which will have each of your routes in it. Mine is in the root directory and called Web.php
- Locate a route that you would like to add caching to
The next step is to locate a route you would like to add caching to, for me I added it here to my search, commented and favorited routes. You can see the new item on the end of the route.

- Add the following code to the end of your route
Add the following code to the end of your route.
->middleware(‘cache.headers:private;max_age=3600’)
Don’t forget to end the line with a semi-colon and you are done! - We did it!
Once you have that setup, now when you navigate to the page that you enabled caching for, things like your background will only be requested by the user one time. You should be able to see this by navigating to the page and having way faster reload times.
I hope this helped you guys out! I know it really helped my website out, if you have any questions, ask in the comments below and I’ll try to help!