
How to Create a Setup file in Visual Studio 2019 – C# or VB.Net
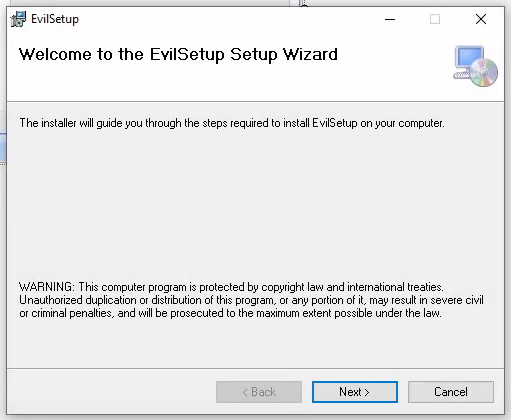
Today we are going to be talking about how to create a setup file in visual studio 2019! This setup file is a packaged version of your application with a wizard that will guide the user through the entire installation process. This will allow the user to install your latest build with ease!
If you have ever written an application and wanted to create an MSI or EXE installer then this is the guide for you! I’m going to go step by step and show you exactly how to create an installer!
The entire process is pretty easy and simply requires a visual studio extension that was developed by Microsoft. This extension is not a 3rd party product nor is it terribly complicated to use.
Alright, so let’s get right into it!
The first thing we’re going to need to do is to download the required extension. The extension we will need is called “Microsoft Visual Studio installer project”

You access the Manage Extensions page by clicking on Extensions and then Manage Extensions at the top
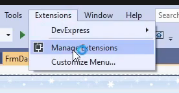
Once you are on the Manage Extensions page, search for this extension. It is one of the most downloaded extensions, so it should be at the top of the list. Go ahead and download it, then we can move on to the next step!
Next, we need to restart visual studio to get it to install the extension. Once visual studio closes this little extension installer will install the new extension.
Once the extension installer comes up hit modify and let it progress through. This can take a second to install but it doesn’t take terribly long. It should only take about a minute or so.
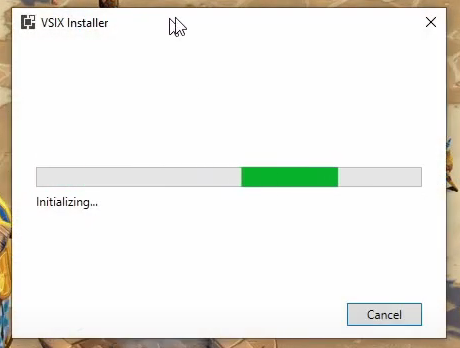
alright, once that has finished installing, you can open visual studio again.
Now that you have Visual studio open again, you want to open the project that you would like to create the installer for. because it’s going to be a second project inside the same solution.
alright, so now that we’ve got our extension ready to go we are going to right-click on the solution and add a new project. This new project is going to be the setup project. Search for the setup project template and choose that as your new project type.
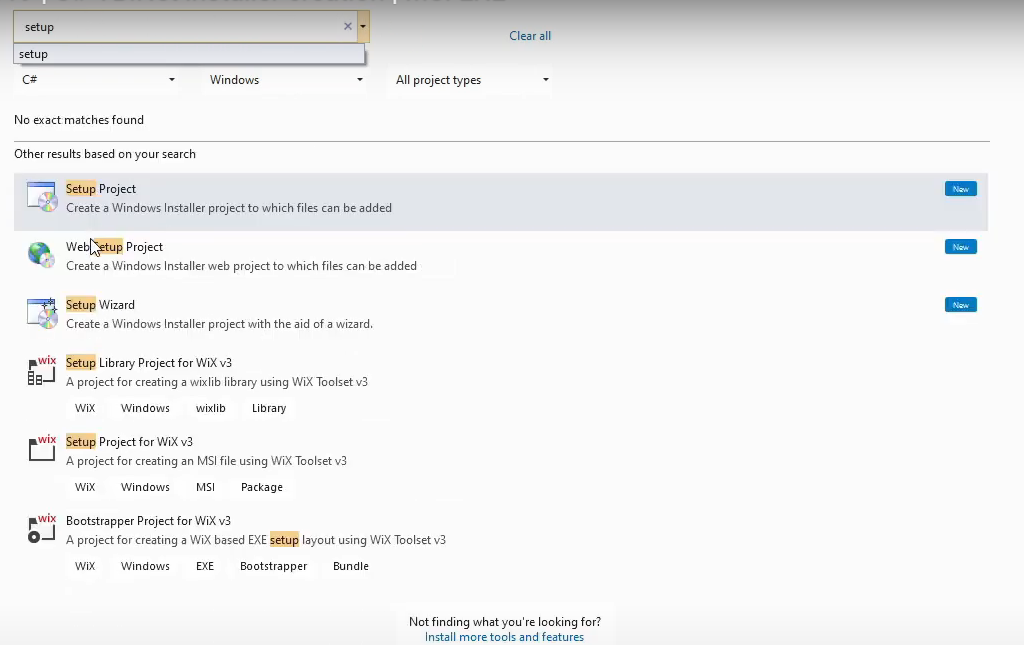
Once you select Setup Project, give it a name and then click create. This will create a second project under your Solution with the name you provided.
If you open that project, you will be greeted with the setup project’s main screen as shown below.
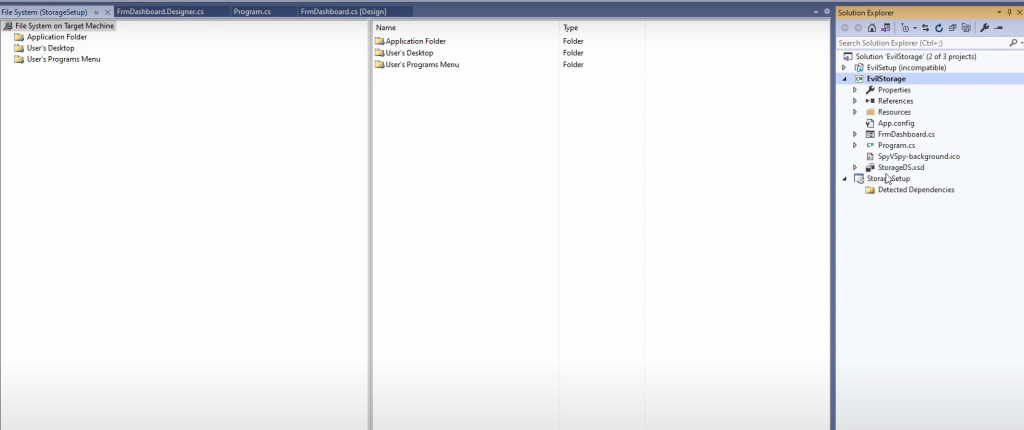
Inside of this project, there will be 3 folders:
- Application folder: This is where your exe and assembly files will be placed.
- Desktop folder: This will be where we put items destined for the user’s desktop.
- User’s Program Menu: This will be where we put items to be added to the user’s program menu.
To configure your new setup project follow these steps
- Add a new project output to the application folder.
Select the Application Folder and then right click and select “Add a new Project Output”. This will copy over all of your dll’s and main exe from your other project. This will look just like your typical Debug folder contents. Add -> Project Output -> “Primary Output”
- Create a new shortcut using the primary output item
Right click the Primary Output item that was added when you added the new project output to the Application Folder. Select “Create Shortcut” to create a new shortcut that we will later move to the desktop section.
- Import a file to be used as a shortcut icon
Right click again, select Add and choose to add a file. Browse for an ico file and import it.
- Update your shortcut’s icon to the new imported icon
Right click on the new shortcut we have created, select “Properties Window”, from here change the icon by clicking browse on the right. Browse into your Application Folder and choose the new icon.
- Copy your shortcut to the User’s Desktop folder
Drag your new shortcut over to the User’s Desktop folder on the left side of the split-screen. This will make the wizard create that shortcut on the user’s desktop when the application is installed.
- Create another shortcut and put it in the User’s Programs Menu
Now that you have the desktop shortcut in place, we need to create one more identical shortcut. Follow the same process to create the shortcut and set it’s icon. After you have the new setup created, right click on User’s Programs Menu and select to create a new folder. Create a folder for your shortcut to be under and then move your new shortcut into that folder. Now the User’s Programs Menu will have a shortcut created in it.
- Update the properties of the new setup project
From this point, I would update a few properties of the setup project.
Author: company or person who wrote the application
Description: simple description about the app
Manufacturer: Used for the install location.
Those are the only properties I updated in my example. - Setup Prerequisites
If you right click the Project and select Properties, you can then click on a button that says “Prerequisites…” This will bring up a screen where you can choose to have certain prerequisites such as certain .net framework versions install with your application.
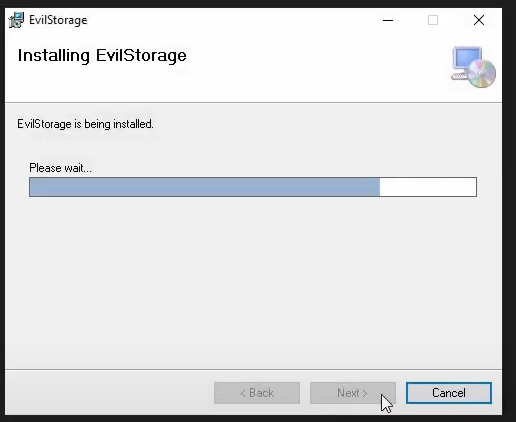
- Build the setup project and Give it a test run!
Right-click on the project and choose build. Once it finishes building, right-click again and select “Open Folder in File Explorer”. This will bring up a folder with your install files in it!
Congratulations! That is all there is to it! At this point, you should have a working setup project! I hope this guide was helpful! I’ll see you in the next one!
Comments ( 3 )